


[wpanchor id=”index”]Index
Adobe Connect basic operations
Test your Microphone and Speaker
iPad, iPhone and Android basics
[wpanchor id=”gettingstarted”]Getting started
Please allow a minimum of 15 minutes to setup Adobe Connect for use the first time and about 5 minutes for subsequent sessions.
The technical moderator is normally online to assist you 20 minutes before your session starts.
[wpanchor id=”installation”]Installation
Normally you already have Flash installed in your browser already for Adobe Connect to be operational.
For best operation: “please install the Adobe Connect – Addin to your browser”.
Link to recommended Installation test
Smartdevice’s like an iPad, iPhone or Android will need the “Adobe Mobile app” installed.
Link to Adobe Connect Smart device guide
[wpanchor id=”recommendations”]Recommendations
- Access to an internet enabled device, preferably a PC/Laptop (an iPad can work, but not a great solution)
- Access to a web browser e.g. Firefox, Safari, Google Chrome.
- A good, constant internet connection. Placing yourself near the wifi router will help with this.
- Good audio capability (placing yourself somewhere with no background noise and using headphones).
- A webcam so that we can see you, should your class be a fully interactive one (these are mostly built in to devices and laptops these days).
If you don’t have your headset plugged in it will most likely cause annoying echo feedback during the meeting when your microphone is active.
[wpanchor id=”adobebasicoperations”]Adobe Connect basic operations
Bellow are the four primary button’s you will utilize to interact in the Adobe Connect classroom.
From the left are your Speaker, Microphone, Webcam & Hand-signals buttons.
If the button is white then, for example, your microphone is not enabled to speak in the class.
![]()
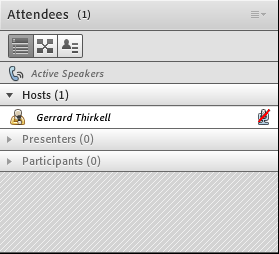
The example two screen’s below show you the microphone in “mute mode” as the microphone button has a stroke through it.
Note most of the time you should have your microphone muted to not interfere with the class.
Normally if you are speaking to Tina, please mute your mic when you have finished, also obviously unmute your mic when its your turn to talk.
![]()
Also you will see your microphone with a red line through it in the Attendee list while your in mute.
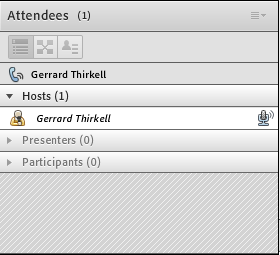
When your microphone is active and you are speaking you will see volume indication on your microphone button as below.
![]()
Also you will see your attendee microphone icon below next to your name and also note that I’m shown as the active speaker in the line above (Hosts (1))
Here is a video of the Speaker, Microphone & Webcam buttons in operation
[wpanchor id=”testinstallation”]Test Installation
This Adobe Connect link allows you to test your installation
Also here is a video showing this test executed
[wpanchor id=”testmicrophonespeaker”]Test your Microphone and Speaker
This video demonstrates the Adobe Connect – Audio Setup Wizard that assists in setting up your microphone and speakers.
[wpanchor id=”adobesupport]Adobe Connect useful links
Adobe Connect keyboard shortcuts
Adobe Connect installation test
Adobe Connect downloads and updates
[wpanchor id=”ipadiphone”]iPad, iPhone and Android operation
Utilizing Adobe Connect on your Smart Device is a bit limited and harder to operate than on a Windows or Mac PC.
One main limitation is that you can only view one stream at a time.
A stream is webcam or music for instance.